
mini sewing machine manual pdf
Mini sewing machine manuals provide essential guidance for operation‚ maintenance‚ and troubleshooting․ They ensure safe and effective use‚ helping users unlock the full potential of their machines․
1․1 Importance of Reading the Manual
Reading the manual is crucial for understanding your mini sewing machine’s operation‚ safety guidelines‚ and troubleshooting․ It provides essential information for proper usage‚ helping you avoid errors and maintain the machine․ The manual ensures you unlock the machine’s full potential‚ understand its features‚ and handle issues effectively․ It’s a vital resource for both beginners and experienced users‚ offering clear instructions for optimal performance and longevity of the machine․ Always refer to it before starting any sewing project to ensure safety and success․
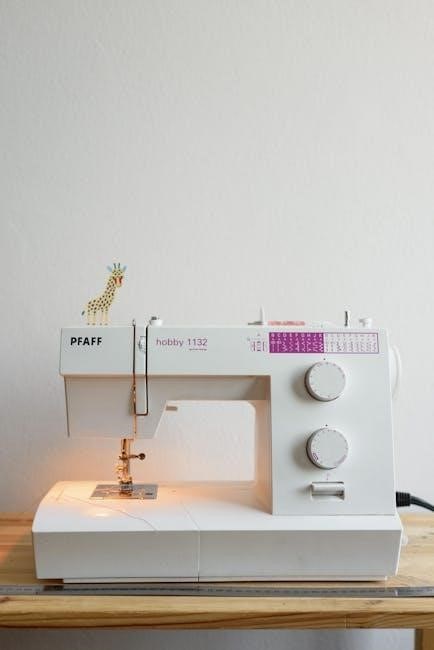
1․2 Overview of Mini Sewing Machine Models
Mini sewing machines come in various models‚ each designed for specific tasks and user levels․ Popular models like the Easy Home Mini Sewing Machine MS-201 and Janome Sew Mini offer compact designs for basic sewing․ These machines are ideal for beginners or occasional use‚ providing essential features for small projects․ Other models may include advanced stitching options or specialized accessories․ Understanding the differences helps users choose the right machine for their needs‚ ensuring efficient and satisfying sewing experiences․
1․3 Key Features of Mini Sewing Machines
Mini sewing machines are compact‚ lightweight‚ and portable‚ making them ideal for small sewing tasks․ They often feature multiple stitch options‚ including straight and zigzag stitches‚ and some models include decorative stitches․ Many come with automatic needle threaders and foot pedals for ease of use․ Some models‚ like the Janome Sew Mini‚ offer advanced features such as adjustable stitch length and tension․ These machines are versatile‚ suitable for various fabrics‚ and often include accessories like standard or specialized feet for different sewing needs․
Safety Precautions and Guidelines
Understanding safety precautions ensures proper machine handling and prevents accidents․ Always follow guidelines for setup‚ operation‚ and maintenance to minimize risks and ensure safe sewing experiences․
2․1 General Safety Tips
- Always read the manual before using the machine to understand its operation and safety features․
- Keep the sewing area clean and clear of clutter to prevent accidents․
- Use the correct power source and avoid overloading the machine․
- Never leave the machine unattended while it is in operation․
- Keep children away from the machine and supervise them during use․
- Unplug the machine when not in use or during maintenance․
- Avoid touching sharp parts or hot surfaces while sewing․
2․2 Workplace Safety Guidelines
Organize your workspace to prevent tripping hazards and ensure good visibility․ Use adequate lighting to illuminate the sewing area and reduce eye strain․ Keep loose clothing or long hair tied back to avoid entanglement with moving parts․ Maintain a safe distance from hot or sharp components․ Regularly inspect the machine and surroundings for potential risks․ Ensure proper ventilation and avoid overloading the sewing machine․ Always follow ergonomic guidelines to prevent fatigue and injuries during extended use․
2․3 Handling Electrical Components Safely
Always prioritize caution when handling electrical components of your mini sewing machine․ Avoid overloading circuits and ensure the machine is plugged into a grounded outlet․ Never touch electrical parts with wet hands or while standing on a damp surface․ Regularly inspect cords for damage or fraying and replace them if necessary․ Keep children away from electrical components․ Unplug the machine when not in use or during maintenance to prevent accidental start-ups or shocks․ This ensures a safe and reliable sewing experience․
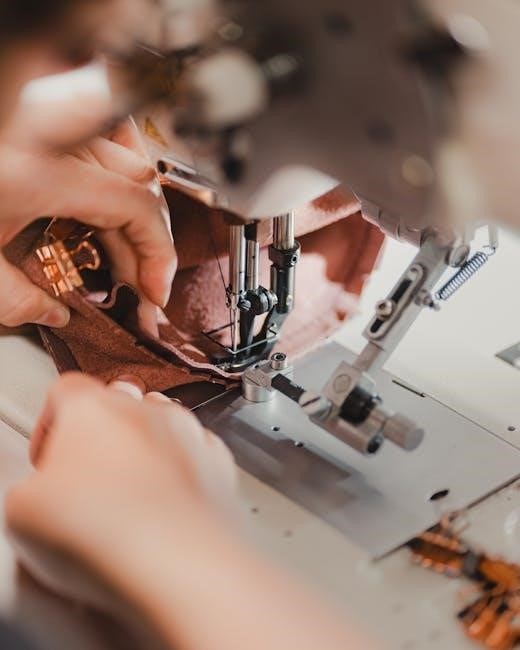
Understanding the Components of a Mini Sewing Machine
Mini sewing machines have key components like the foot pedal‚ power switch‚ spool pins‚ and bobbin․ Understanding these parts is crucial for effective operation and maintenance․
3․1 Identifying Machine Parts
Identifying the parts of your mini sewing machine is essential for proper use․ Key components include the power switch‚ foot pedal‚ spool pins‚ bobbin‚ and stitch selectors․ The standard foot‚ often a straight stitch or zigzag foot‚ is crucial for basic sewing․ Additional feet‚ like a zipper foot‚ may be included for specialized tasks․ Refer to the manual for detailed diagrams to locate and understand each part; This knowledge helps in troubleshooting and ensures efficient operation․ Always cross-check with the manual for specific model variations․
3․2 Functions of Each Component
Understanding the function of each part is crucial for effective sewing․ The power switch activates the machine‚ while the foot pedal controls sewing speed․ Spool pins hold thread‚ and the bobbin manages the underside stitching․ Stitch selectors choose patterns‚ and tension dials adjust thread tightness․ The standard foot guides fabric‚ and optional feet like the zipper foot handle specific tasks․ Each component works together to ensure smooth operation․ Always consult the manual for model-specific functions and optimal performance․ Cross-referencing diagrams aids in mastering machine operations efficiently․
3․3 Standard Feet and Accessories
Mini sewing machines come with standard feet and accessories to enhance sewing capabilities․ The standard foot is ideal for straight stitching‚ while the zipper foot handles zippers and thick fabrics․ Additional accessories like bobbins‚ needles‚ and spool pins are essential for proper operation․ Optional feet‚ such as the blind hem or embroidery foot‚ expand creative possibilities․ These attachments are usually detailed in the manual‚ ensuring users can utilize them effectively for various sewing projects․ Accessories vary by model‚ so always refer to the manual for compatibility and usage guidelines․
Threading the Mini Sewing Machine
Threading the mini sewing machine correctly is crucial for proper operation․ Follow the manual’s guide for upper thread and bobbin setup․ Use the spool pin correctly and ensure the thread runs smoothly through the machine․ Proper tension is essential․ Refer to the manual for specific model instructions․
4․1 Threading the Upper Thread
Threading the upper thread on a mini sewing machine requires careful attention․ Place the thread on the spool pin‚ then gently guide it through the machine’s tension discs․ Follow the manual’s diagram to ensure the thread passes correctly through the take-up lever and needle․ Secure the thread end in the needle․ Consult your specific model’s manual‚ like the Janome Sew Mini or Easy Home MS-201‚ for precise instructions․ Proper threading ensures smooth stitching and prevents tangles or knots․ Always check for any twists or loops before sewing․
4․2 Threading the Bobbin
Threading the bobbin correctly is crucial for smooth stitching․ Use the same thread as the upper thread and wind it evenly around the bobbin․ Insert the bobbin into the bobbin case‚ ensuring it sits securely․ Gently pull the thread to seat it properly․ Refer to your mini sewing machine manual‚ such as the Janome Sew Mini guide‚ for specific instructions․ Proper bobbin threading prevents jams and ensures balanced stitches․ Always keep the machine upright during this process for accurate tension․
4․3 Common Threading Mistakes to Avoid
Avoid common threading mistakes like overfilling the bobbin‚ which can cause jams․ Ensure the thread is seated properly in the tension spring․ Never pull the thread too tightly‚ as this can misalign the bobbin case․ Always use the correct thread type and size recommended in your mini sewing machine manual․ Neglecting to trim excess thread or not following the machine’s threading path can lead to poor stitch quality․ Consult your manual‚ such as the Janome Sew Mini guide‚ for specific threading tips to ensure optimal performance․
Basic Operations and Stitching
Mastering basic operations and stitching is essential for effective sewing․ Start with a simple straight stitch‚ adjust tension‚ and practice sewing forward and backward for consistent results․
5․1 Starting Your First Stitch
Starting your first stitch involves threading the machine‚ ensuring proper tension‚ and placing fabric under the presser foot․ Gently press the pedal to begin sewing․ Use a straight stitch for simplicity and maintain steady fabric movement․ Adjust speed as needed for control․ Always test stitches on scrap fabric before sewing actual projects to ensure consistency and avoid mistakes․ This step builds confidence and familiarity with the machine’s operation․
5․2 Adjusting Stitch Length and Tension
Adjusting stitch length and tension ensures proper fabric handling and prevents issues like puckering or loose stitches․ Use the stitch length dial to set the desired length‚ typically between 0․5mm to 4mm․ Tension dials control thread tightness; balance upper and bobbin tension for even stitching․ Test adjustments on scrap fabric to achieve the perfect seam․ Proper settings vary by fabric type‚ so consult your manual for specific recommendations to optimize your sewing results․
5․3 Sewing Forward and Reverse
Mastering forward and reverse stitching is essential for precise sewing․ Start by sewing forward to create straight seams․ Engage the reverse stitch button or lever to sew backward‚ securing seams at the beginning and end․ This prevents fraying and ensures durability․ For thicker fabrics‚ consider backstitching manually․ Always consult your manual for specific instructions on reversing‚ as mechanisms vary between models․ Proper use of these functions enhances the quality and finish of your projects․
Advanced Techniques for Mini Sewing Machines
Explore advanced sewing techniques to enhance creativity and efficiency․ Learn specialized stitches‚ fabric handling‚ and customization options to expand your sewing capabilities with mini machines․
6․1 Sewing Different Fabrics
Mastering various fabrics is crucial for successful sewing․ Mini machines can handle lightweight materials like cotton and silk but may struggle with thicker fabrics․ Adjusting stitch length and tension ensures optimal results․ Use appropriate feet for delicates or heavy-duty projects․ Always pre-test fabric samples to avoid damage․ Proper fabric handling enhances accuracy and prevents machine jamming‚ ensuring smooth stitching every time․
6․2 Creating Decorative Stitches
Mini sewing machines offer versatile stitch options for decorative sewing․ From straight and zigzag stitches to intricate patterns‚ these machines allow creativity․ Adjust the stitch length and width for personalized designs․ Use the reverse stitch function to secure seams․ For embellishments‚ experiment with different thread colors and fabric types․ Refer to your manual for specific stitch settings and techniques to achieve professional-looking results effortlessly․ This feature is perfect for crafting‚ quilting‚ or adding unique touches to garments․
6․3 Tips for Sewing Curves and Corners
Sewing curves and corners requires precision and control․ Use a walking foot or zipper foot for smooth fabric handling․ Adjust stitch length and width to accommodate curves․ Keep fabric steady‚ avoiding pulls that distort material․ For sharp corners‚ reduce speed and pivot slowly․ Marking fabric with pins or chalk helps guide stitching․ Practice on scrap fabric to master technique․ Refer to your manual for foot recommendations and stitch settings to achieve flawless curves and corners in your projects․

Maintenance and Troubleshooting
Regular cleaning and lubrication ensure smooth operation․ Address jams promptly and adjust tension as needed․ Refer to the manual for troubleshooting common issues and maintenance tips․
7․1 Cleaning and Lubricating the Machine
Regular cleaning and lubrication are crucial for maintaining your mini sewing machine’s performance․ Use a soft brush to remove lint and debris from the bobbin case and feed dogs․ Avoid harsh chemicals; instead‚ wipe surfaces with a microfiber cloth․ Lubricate moving parts with sewing machine oil as recommended in the manual‚ typically every 10 hours of use․ Proper maintenance prevents jams and ensures smooth stitching․ Always unplug the machine before cleaning or lubricating for safety․
7․2 Common Issues and Solutions
Common issues with mini sewing machines include thread jams‚ uneven stitching‚ and machine noise․ Check for loose threads or debris in the bobbin area․ Adjust tension settings as per the manual․ If stitches are uneven‚ ensure the bobbin is correctly seated․ Lubricate moving parts periodically to reduce noise․ Consult the troubleshooting section for specific solutions or reset the machine by unplugging and replugging it․ Always refer to the manual for model-specific guidance to resolve issues effectively․
7․3 When to Contact a Professional
If you encounter issues beyond basic troubleshooting‚ such as electrical malfunctions or severe mechanical damage‚ contact a professional․ This is especially true for complex problems like faulty motors or broken gears․ If DIY solutions fail or you’re unsure about advanced repairs‚ consulting an expert ensures safety and prevents further damage․ Additionally‚ if your machine requires specialized tools or servicing‚ professional assistance is recommended to maintain its performance and longevity․
Accessories and Attachments
Mini sewing machines often come with essential accessories like standard feet‚ zipper feet‚ and bobbin winders․ Upgraded attachments can enhance functionality for specialized tasks․
8․1 Essential Accessories for Mini Machines
Essential accessories for mini sewing machines include standard sewing feet‚ zipper feet‚ and bobbin winders․ These enhance functionality‚ allowing users to handle various fabrics and tasks efficiently․ Additional accessories like extension tables or carry cases can also be beneficial․ Always ensure compatibility with your specific machine model for optimal performance․ These accessories are often included in the machine’s package or can be purchased separately online‚ providing users with the tools needed for diverse sewing projects․
8․2 Using Specialized Feet
Specialized feet for mini sewing machines enhance sewing precision and versatility․ The standard foot is ideal for straight stitching‚ while the zipper foot handles zippers and thick fabrics․ The blind hem foot is perfect for invisible hems‚ and the embroidery foot allows for decorative stitching․ Always refer to your manual to identify the correct foot for your project․ Properly attaching and using these feet ensures professional results and expands your creative possibilities with ease and efficiency․
8․3 Upgrading Your Machine
Upgrading your mini sewing machine can enhance its performance and capabilities․ Manuals guide users in finding compatible parts and accessories‚ such as advanced stitch options or specialized feet․ These upgrades expand versatility for diverse projects․ Always follow manual instructions to ensure compatibility and safety‚ avoiding potential damage․ Upgrades can refresh your machine‚ making it more efficient and adaptable for both basic and complex tasks‚ ensuring longevity and improved functionality․
Finding and Downloading Mini Sewing Machine Manuals
Mini sewing machine manuals are available on official manufacturer websites and third-party repositories․ They provide free downloads‚ ensuring proper operation‚ safety‚ and maintenance guidance for users․
9․1 Official Manufacturer Websites
Official manufacturer websites are the most reliable source for mini sewing machine manuals․ Brands like Janome‚ Singer‚ and Brother offer free PDF downloads․ These manuals are specific to each model‚ ensuring accuracy and relevance․ They include detailed instructions‚ diagrams‚ and troubleshooting tips․ Users can easily search by model number or product name․ Additionally‚ official sites often provide updates and additional resources‚ making them the go-to for authentic and comprehensive guides․
9․2 Third-Party Manual Repositories
Third-party websites like ManualsLib‚ Scribd‚ and DeviceManuals host a wide range of sewing machine manuals․ These platforms aggregate manuals from various brands‚ offering free PDF downloads․ They are particularly useful for vintage or discontinued models․ While convenient‚ users should verify the manual’s compatibility with their specific machine model․ Some repositories may require registration or subscription for access․ These sites are a valuable resource when official manufacturer manuals are unavailable or hard to find․
9․3 Tips for Searching Online
When searching for mini sewing machine manuals online‚ use specific keywords like the model name and “manual PDF․” Check official manufacturer websites first‚ as they often provide free downloads․ If unavailable‚ third-party repositories like ManualsLib or Scribd can be useful․ Ensure the manual matches your machine’s make and model for accuracy․ Be cautious of unreliable sources and verify the file format before downloading․ This approach streamlines your search and ensures you find the correct guide efficiently․
Mastering your mini sewing machine begins with the manual․ Experiment with projects‚ explore fabric types‚ and refine techniques to expand your sewing skills confidently․
10․1 Recap of Key Manual Insights
Mini sewing machine manuals cover essential topics like setup‚ operation‚ and troubleshooting․ They emphasize proper threading‚ tension adjustment‚ and stitch selection․ Safety guidelines are highlighted to prevent accidents․ Maintenance tips‚ such as cleaning and lubricating‚ ensure longevity․ These manuals also provide resources for further learning and troubleshooting common issues‚ helping users maximize their machine’s potential and enhance their sewing skills effectively․
10․2 Encouragement for Further Learning
Exploring beyond the manual fosters creativity and skill improvement․ Engage with tutorials‚ sewing communities‚ and online courses to master advanced techniques․ Practice diverse fabrics and projects to build confidence․ Stay updated with trends and new features in mini sewing machines․ Continuous learning enhances your sewing journey‚ helping you unlock new possibilities and enjoy the satisfaction of creating something unique and personalized․
10․3 Resources for Additional Support
For further assistance‚ explore official manufacturer websites like Janome or Singer‚ which offer detailed manuals and FAQs․ Third-party sites such as ManualsLib or ManualsOnline provide a wide range of sewing machine manuals․ Join online communities like Reddit’s r/sewing or Facebook sewing groups for peer support․ YouTube tutorials and crafting blogs also offer step-by-step guides․ If needed‚ contact customer support for personalized help․ Local sewing classes or workshops can provide hands-on learning․ These resources ensure you never feel stuck‚ helping you master your mini sewing machine․