
dynex tv user guide
Welcome to the Dynex TV User Guide! This comprehensive manual helps you navigate your television’s features‚ from installation to advanced settings‚ ensuring an optimal viewing experience.
Overview of Dynex TV Features
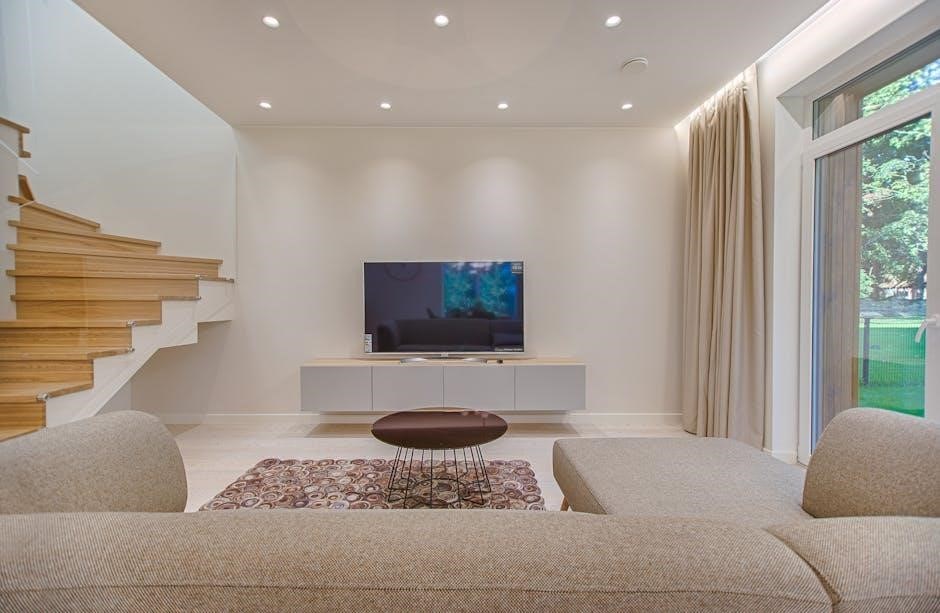
Dynex TVs offer a range of innovative features designed to enhance your viewing experience. With LED displays‚ 4K resolution‚ and smart TV capabilities‚ these televisions provide crisp visuals and seamless connectivity. They support wireless and Bluetooth connections‚ enabling easy integration with external devices. The user-friendly interface allows for intuitive navigation‚ while features like HDR and voice control add convenience. Dynex TVs also come with energy-saving options and compatibility with various accessories‚ ensuring a versatile and enjoyable entertainment experience for all users.
Importance of Reading the User Manual
Reading the Dynex TV user manual is essential for maximizing your viewing experience. It provides detailed instructions for setup‚ troubleshooting‚ and utilizing advanced features like HDR and voice control. The manual ensures you understand all functionalities‚ from connectivity options to energy-saving modes. By following the guide‚ you can resolve common issues quickly and optimize your TV’s performance. It serves as a comprehensive resource to help you enjoy all the benefits of your Dynex TV effortlessly.
Product Specifications
This section outlines the technical details of your Dynex TV‚ including model variants‚ display types‚ and key features like 4K resolution and HDR support for enhanced viewing.
Model Overview and Variants
Dynex TVs are available in various models‚ such as the DX-32D310NA15 and DX-32L221A12‚ offering diverse features like LED screens‚ 4K resolution‚ and HDR support. These models cater to different preferences‚ ranging from basic viewing to advanced smart TV capabilities. The DX-32L220A12 is another popular variant‚ known for its sleek design and user-friendly interface. Each model is designed to provide a high-quality viewing experience‚ with options to suit both budget-conscious buyers and those seeking premium features.
Display and Resolution Details
Dynex TVs feature high-quality displays with LED technology‚ offering crisp visuals and vibrant colors. Models like the DX-32D310NA15 and DX-32L221A12 provide HD and 4K resolution options‚ ensuring sharp imagery. The LED screens are energy-efficient and designed for long-lasting performance. With options for HDR support‚ Dynex TVs deliver enhanced contrast and color accuracy‚ making them ideal for immersive viewing experiences. Whether you choose HD or 4K‚ Dynex ensures a stunning display tailored to your entertainment needs.
Audio and Sound System Specifications
Dynex TVs are equipped with advanced audio systems‚ including stereo speakers and support for Dolby Digital Plus and DTS technologies. Models like the DX-32D310NA15 and DX-32L221A12 offer clear‚ immersive sound. The TVs also feature HDMI ARC for connecting external sound systems and Bluetooth compatibility for wireless audio devices. These features ensure a rich auditory experience‚ enhancing your entertainment with high-quality sound tailored to your preferences.
Unboxing and Initial Setup
Unbox your Dynex TV carefully‚ ensuring all components like the stand‚ remote‚ and cables are included. Place the TV on a stable surface and connect essential cables.
What’s Included in the Box
Your Dynex TV box includes the television unit‚ a stand‚ remote control‚ power cable‚ HDMI cables‚ and a user manual. Ensure all items are present before disposal.
Physical Installation and Mounting Options
For physical installation‚ place the Dynex TV on a sturdy stand or mount it on a wall using the provided hardware. Ensure the surface is level and stable. Wall mounting requires compatible brackets and careful measurement to avoid damage. Refer to the user manual for specific instructions and safety precautions to ensure secure installation and optimal viewing angles.
Connecting Power and Essential Cables
Connect the power cord to a nearby outlet and ensure it is securely plugged in. Attach HDMI cables to the designated ports for devices like Blu-ray players or gaming consoles. Carefully insert each cable into the correct port to avoid damage. Turn on the TV and follow on-screen prompts to detect connected devices. Refer to the user manual for specific cable configurations. Ensure all connections are tight to prevent signal loss and interference. This setup ensures optimal performance and a seamless viewing experience.
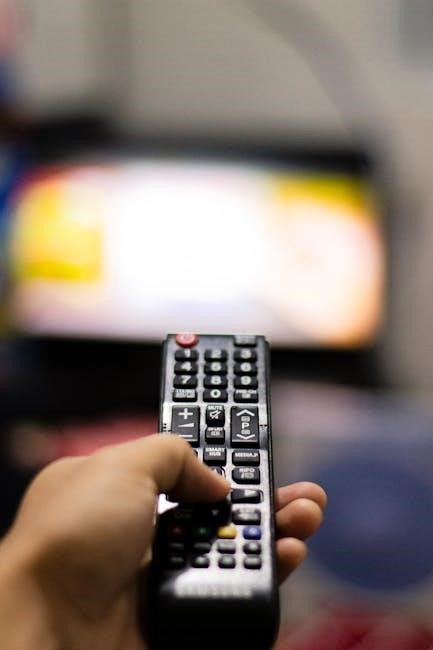
Remote Control Guide
Explore your Dynex TV’s remote control features. Learn navigation‚ button functions‚ and programming for universal use. This guide enhances your viewing experience with ease.
Understanding the Remote Control Layout
The remote control is your gateway to navigating Dynex TV features. Familiarize yourself with its intuitive layout‚ featuring clearly labeled buttons for power‚ volume‚ and navigation. The central directional pad simplifies menu browsing‚ while dedicated buttons for settings and smart TV functions provide quick access. Understanding the remote’s design enhances your ability to control and customize your viewing experience effortlessly.
Basic Navigation and Button Functions
Mastering the remote’s basic functions is key to seamless navigation. The directional pad allows easy menu browsing‚ while the OK button confirms selections. Essential buttons like Power‚ Volume Up/Down‚ and Menu provide quick access to core functions. The Home button returns you to the smart TV interface‚ and the Back button navigates to the previous screen. These intuitive controls ensure effortless interaction with your Dynex TV‚ making it simple to adjust settings‚ launch apps‚ and enjoy your content.
Programming the Remote for Universal Use
Programming your Dynex TV remote for universal use allows control of multiple devices. Refer to the user manual for specific codes and instructions. Press and hold the “Setup” button until the light blinks‚ enter the device code‚ and test functionality. This feature enables seamless control of compatible devices‚ enhancing your viewing experience. Ensure codes are correctly entered for optimal performance‚ as outlined in the provided guides;

Picture and Sound Settings
Adjust display and audio settings to enhance your viewing experience. Use the user manual for guidance on optimizing picture quality and sound output for your Dynex TV.
Adjusting Display Settings for Optimal Viewing
Access the display settings via the on-screen menu to customize brightness‚ contrast‚ and color balance. Adjust these settings based on lighting conditions for the best picture quality. Enable HDR for enhanced color and detail in supported content. Use preset modes like Movie or Game mode for optimized viewing experiences. Refer to the user manual for detailed instructions on fine-tuning these settings to suit your preferences and ensure a superior visual experience on your Dynex TV.
Customizing Sound Settings and Equalizer
Access the audio menu to tailor sound settings to your preference. Use preset modes like Movie or Music for optimized audio. Adjust the equalizer to boost bass‚ treble‚ or mid-range frequencies. Enable surround sound or voice clarity features for enhanced dialogue. Fine-tune settings based on content type or room acoustics. Refer to the user manual for detailed steps on customizing audio settings to achieve the best sound quality for your viewing experience on your Dynex TV.
Enabling HDR and Other Advanced Features
To enhance your viewing experience‚ enable HDR (High Dynamic Range) on your Dynex TV. Navigate to the Picture Settings menu‚ select HDR Mode‚ and choose Auto or On. Ensure your HDMI ports are set to HDR-compatible modes. Explore additional advanced features like 4K resolution‚ motion smoothing‚ and color calibration. Refer to the user manual for specific instructions‚ as settings may vary by model. Adjusting these features optimizes brightness‚ contrast‚ and color accuracy‚ delivering a more immersive entertainment experience on your Dynex TV;
Connectivity Options
Your Dynex TV offers versatile connectivity options‚ including HDMI ports for high-definition devices‚ USB ports for media playback‚ and wireless/Bluetooth capabilities for seamless smart connections.
HDMI and USB Port Configuration
Locate the HDMI and USB ports on the rear or side of your Dynex TV. HDMI ports support high-definition video and audio‚ while USB ports allow media playback. Connect devices like Blu-ray players or gaming consoles to HDMI ports for optimal performance. Use USB ports to play content from flash drives or external hard drives. Ensure devices are properly plugged in and configured via the TV’s settings menu for seamless connectivity and functionality.
Wireless and Bluetooth Connectivity Setup
To set up wireless connectivity on your Dynex TV‚ go to the TV’s settings menu and select “Network” or “Wi-Fi” to connect to your home network. Enter your Wi-Fi password when prompted. For Bluetooth‚ enable pairing mode on your device‚ such as headphones or speakers‚ and select it from the TV’s Bluetooth device list. This allows seamless audio streaming. Ensure both devices are in close proximity for a stable connection. Restarting the TV may resolve any connectivity issues during setup.
Setting Up Internet and Smart TV Features
To set up internet and Smart TV features on your Dynex TV‚ connect to Wi-Fi via the settings menu. Once connected‚ access the Smart TV interface to explore apps like Netflix and Hulu. Download apps from the store and sign in with your accounts. Refer to the user manual for detailed instructions. For models like the DX-32L220A12‚ ensure your TV is updated to the latest software for optimal performance. This setup enables streaming and multi-device control‚ enhancing your entertainment experience.
Smart TV Features
Explore a world of entertainment with Dynex TV’s Smart TV features. Access streaming services‚ download apps‚ and enjoy multi-device control for a seamless viewing experience.
Accessing and Navigating the Smart TV Interface
To access the Smart TV interface‚ press the Home button on your Dynex TV remote. This will display a user-friendly menu with options for apps‚ settings‚ and streaming services. Use the navigation pad to scroll through options and select desired features. The interface is designed for intuitive browsing‚ making it easy to explore content and customize your viewing experience.
Key features include app downloads‚ multi-device control‚ and quick access to settings. Navigate seamlessly with the remote’s directional buttons and confirm selections with the OK button. The back button helps you return to previous screens‚ ensuring smooth navigation.
Downloading and Managing Apps
To download apps on your Dynex TV‚ navigate to the Smart TV interface and select the App Store. Browse through available apps‚ choose your desired app‚ and select Download. Once installed‚ apps appear on the home screen for easy access. To manage apps‚ go to Settings > Applications‚ where you can update‚ uninstall‚ or rearrange apps. This feature enhances your entertainment experience by providing access to streaming services‚ games‚ and more.
Streaming Services and Multi-Device Control
Access popular streaming services like Netflix‚ Hulu‚ and Amazon Prime directly through your Dynex TV’s Smart TV interface. For multi-device control‚ connect compatible devices via HDMI or Bluetooth to create a seamless entertainment experience. Use the remote to control multiple devices or sync your smartphone for enhanced functionality. Ensure all devices are properly connected and configured for optimal performance. Refer to the user manual for detailed setup instructions and troubleshooting tips to maximize your streaming and multi-device control capabilities.

Troubleshooting Common Issues
Resolve connectivity‚ picture‚ or sound problems by checking cables‚ restarting the TV‚ or updating software. Refer to the user manual for detailed solutions and guidance.
Resolving Connectivity Problems
Ensure all cables are securely connected to the correct ports. Restart your TV and router to refresh the connection. Check for firmware updates‚ as outdated software can cause issues. If wireless connectivity fails‚ reset your network settings or use an Ethernet cable for a stable link. For HDMI or USB problems‚ try swapping ports or using different cables. Refer to the user manual for detailed troubleshooting steps and guidance on resolving specific connectivity errors.
Fixing Picture and Sound Glitches
Power cycle your TV by unplugging it‚ waiting 30 seconds‚ and plugging it back in. Adjust display settings to match your content’s resolution. Ensure HDMI cables are securely connected and functioning properly. For sound issues‚ check audio settings and ensure the correct output is selected. If glitches persist‚ update your TV’s firmware to the latest version. Refer to the user manual for detailed troubleshooting steps to resolve picture and sound-related problems effectively.
Updating Firmware and Software
To keep your Dynex TV running smoothly‚ regular firmware and software updates are essential. Access the settings menu‚ navigate to the “Support” or “System” section‚ and select “Software Update.” Ensure your TV is connected to the internet for automatic updates. Download and install the latest version‚ then restart your device. Always follow on-screen instructions carefully to avoid interruptions. Regular updates enhance performance‚ add new features‚ and improve security. Refer to your user manual for detailed steps on updating your Dynex TV.
Maintenance and Care
Proper handling and storage are crucial. Avoid extreme temperatures and physical stress. Regularly update software for optimal performance. Consult the user manual for detailed care instructions.
Cleaning the Screen and Exterior
To maintain your Dynex TV’s appearance‚ clean the screen with a soft‚ dry cloth. Avoid harsh chemicals or abrasive materials that may damage the display. For stubborn smudges‚ lightly dampen the cloth with distilled water‚ but ensure it’s thoroughly dry before wiping. Clean the exterior with a gentle‚ non-static cleaner to prevent dust buildup. Regular cleaning enhances picture quality and prolongs the TV’s lifespan. Always avoid direct sunlight or moisture exposure to prevent damage.
Updating Software Regularly
Regular software updates ensure your Dynex TV performs optimally‚ with improved features and security. To update‚ go to the TV’s settings menu‚ select “Support” or “System Update‚” and follow on-screen instructions. Ensure a stable internet connection for a smooth update process. Refer to your user manual for detailed steps. Keeping your TV updated enhances performance‚ adds new features‚ and resolves potential issues. Always use the latest software version for the best viewing experience.
Energy-Saving Tips and Power Management
To reduce energy consumption‚ adjust your Dynex TV’s brightness and backlight settings. Enable “Eco Mode” or “Power Saving” in the settings menu. Turn off features like HDMI-CEC and voice controls when not in use. Use the “Auto Shut Off” feature to turn the TV off after a period of inactivity. These settings help lower power usage while maintaining performance. Refer to your user manual for specific instructions on optimizing energy efficiency for your Dynex TV model.
Accessories and Compatible Devices
Enhance your Dynex TV experience with compatible accessories like wall mounts‚ soundbars‚ and universal remotes. Ensure seamless connectivity with HDMI cables and wireless devices for optimal performance.
Recommended Accessories for Dynex TV
Enhance your viewing experience with recommended accessories like wall mounts‚ soundbars‚ and universal remotes. A low-profile tilting mount ensures optimal screen positioning‚ while a soundbar boosts audio quality. Universal remotes simplify control‚ and HDMI cables ensure reliable connections. Wireless devices like Bluetooth speakers or streaming dongles add convenience. These accessories are designed to complement your Dynex TV‚ offering seamless integration and improved performance. Choose compatible products to maximize your entertainment setup and enjoy a hassle-free experience.
Compatible Soundbars and Speakers
For an enhanced audio experience‚ pair your Dynex TV with compatible soundbars and speakers. Look for systems with HDMI ARC or optical inputs for seamless connectivity. Ensure compatibility by checking the TV’s audio output specifications. Wireless Bluetooth speakers are also a great option for flexible setups. Choose devices that support the same audio formats as your TV for optimal performance. This will elevate your entertainment experience with crystal-clear sound and immersive quality‚ perfectly complementing your Dynex TV’s visuals.
Using External Devices with Dynex TV
Connecting external devices to your Dynex TV is straightforward. Use HDMI ports for Blu-ray players‚ gaming consoles‚ or soundbars‚ ensuring optimal audio and video quality. USB ports support external drives‚ peripherals‚ or media players. For wireless connectivity‚ enable Bluetooth or Wi-Fi to link compatible devices. Always ensure devices are powered on and set to the correct input. Check compatibility with your TV’s specifications to avoid issues and enjoy a seamless entertainment experience with your Dynex TV.
Warranty and Customer Support
Your Dynex TV comes with a comprehensive warranty program. For support‚ visit the official website or contact customer service for assistance with troubleshooting or repairs.
Understanding the Warranty Terms
Your Dynex TV is backed by a comprehensive warranty program. The standard warranty typically covers parts and labor for one year from the purchase date. It protects against manufacturing defects‚ ensuring your TV functions as intended. For detailed terms‚ refer to the warranty section in your user manual. Registration may be required to activate warranty benefits. Accidental damage or misuse are generally not covered. Contact Dynex customer support for any warranty-related inquiries or claims.
Contacting Dynex Customer Support
For assistance with your Dynex TV‚ contact customer support through the official website or phone. Support is available to address technical issues‚ warranty inquiries‚ or general questions. Visit the Dynex website for contact details‚ including phone numbers‚ email‚ and live chat options. Ensure to have your TV model number and purchase details ready for efficient service. Refer to your user manual for additional support resources or troubleshooting guides. Dynex customer support is committed to providing timely and effective solutions for your TV needs.
Registering Your Dynex TV
Registering your Dynex TV is essential for warranty validation and personalized support. Visit the official Dynex website and navigate to the registration section. Fill in the required details‚ including your TV’s model number‚ purchase date‚ and contact information. Ensure accuracy to avoid delays in processing. Registration provides access to exclusive updates‚ extended warranty benefits‚ and priority customer support. Keep your registration confirmation for future reference. This step ensures seamless service and enhances your overall Dynex TV experience.
Advanced Features
Explore advanced features like voice control‚ multi-view options‚ and parental controls for enhanced convenience and personalized entertainment on your Dynex TV.
Using Voice Control with Dynex TV
Activate voice control on your Dynex TV for hands-free navigation. Use compatible devices or the remote’s voice button to access menus‚ adjust settings‚ and launch apps effortlessly. Ensure the remote has a built-in microphone for this feature. Speak clearly to control volume‚ change channels‚ or search for content. This feature enhances convenience and streamlines your viewing experience‚ making it easier to enjoy your favorite shows and movies without manual adjustments.
Enabling Parental Controls
Enable parental controls on your Dynex TV to restrict access to certain content. Navigate to the settings menu‚ select “Parental Controls‚” and set a PIN. Customize restrictions for channels‚ apps‚ and maturity ratings. This feature ensures a safe viewing environment for children. Remember to store the PIN securely to avoid lockouts. Adjust settings as needed to tailor content access according to your preferences.
Exploring Multi-View and Split-Screen Options
Discover the multi-view and split-screen features on your Dynex TV for a enhanced viewing experience. These options allow you to watch multiple sources simultaneously‚ perfect for comparing content or multitasking. Access the feature through the settings menu‚ where you can customize the layout and select input sources; The split-screen mode supports up to two windows‚ while multi-view offers more options. Adjust the size and position of windows for optimal convenience. This feature is ideal for sports‚ news‚ or streaming multiple shows at once.
Thank you for reading the Dynex TV User Guide. This comprehensive guide has covered essential features‚ setup‚ and troubleshooting to enhance your viewing experience. Explore and enjoy!
Final Tips for Optimal Dynex TV Experience
Regularly update your TV’s software to access the latest features and improvements. Clean the screen with a soft cloth to maintain clarity. Adjust display settings to suit your viewing environment for the best picture quality. Explore the smart TV interface to discover new apps and streaming services. Use high-quality HDMI cables for optimal connectivity. Experiment with sound settings to enhance your audio experience. By following these tips‚ you can maximize your Dynex TV’s performance and enjoy a superior entertainment experience.
Staying Updated with New Features and Updates
Regularly check for firmware and software updates to ensure your Dynex TV performs at its best. Updates often add new features‚ improve performance‚ and fix issues. To update‚ go to the TV’s settings menu‚ select “Support” or “System Update‚” and follow the on-screen instructions. Refer to your user manual for detailed guidance. Staying updated ensures you enjoy the latest enhancements and security improvements‚ keeping your viewing experience fresh and optimized.