
powersmart snow blower manual
Welcome to the PowerSmart Snow Blower Manual! This guide provides essential information for safe operation‚ assembly‚ and maintenance of your snow blower‚ ensuring optimal performance and longevity.
1.1. Purpose and Scope of the Manual
This manual is designed to provide comprehensive guidance for the safe and efficient operation of your PowerSmart Snow Blower. It covers essential topics such as assembly‚ maintenance‚ and troubleshooting‚ ensuring optimal performance. The scope includes detailed instructions for proper setup‚ safety precautions‚ and best practices for various operating conditions. By following this guide‚ users can maximize the lifespan of their snow blower and ensure reliable snow-clearing performance. The manual is structured to address both novice and experienced users‚ offering clear‚ step-by-step instructions and visual aids for ease of understanding. Refer to this manual for all aspects of snow blower operation‚ from initial setup to seasonal storage‚ to guarantee safety and effectiveness.
Safety Information
This section outlines essential safety guidelines to ensure the safe operation of your PowerSmart Snow Blower. Always read and follow the precautions to avoid potential hazards and ensure safe operation.
2.1. General Safety Precautions
Before operating your PowerSmart Snow Blower‚ read this manual thoroughly. Always wear protective gear‚ including gloves‚ safety glasses‚ and sturdy footwear. Ensure children and pets are at a safe distance. Never operate the snow blower near open flames‚ sparks‚ or in poorly ventilated areas; Avoid wearing loose clothing that could get caught in moving parts. Be cautious of slippery surfaces and uneven terrain. Never touch hot or moving parts‚ and always turn off the engine before performing maintenance. Follow all safety labels and instructions to minimize risks and ensure safe operation. Proper precautions will help prevent accidents and protect both you and your equipment.
2.2. Safety Warnings and Cautions
Always adhere to the following safety warnings and cautions to ensure safe operation of your PowerSmart Snow Blower. Never leave the snow blower unattended while it is running. Keep children and pets away from the operating area. Avoid operating the snow blower in extreme weather conditions‚ such as during a lightning storm or heavy ice. Never touch hot engine parts or moving components while the machine is in use. Do not modify the snow blower or disable safety features‚ as this can lead to accidents. Be cautious of obstacles‚ such as rocks or ice‚ which may cause damage or pose a hazard. Always follow the recommended operating procedures outlined in this manual to ensure safety and optimal performance.
2.3. Safe Handling and Operating Tips
Proper handling and operation are crucial for ensuring safety and efficiency. Always wear appropriate winter gear‚ including gloves and sturdy footwear‚ to maintain grip and control. Start the snow blower on a flat surface and gradually adjust to slopes‚ never exceeding the recommended angle. Keep the chute directed away from people and windows to prevent accidents. Avoid overloading the machine‚ as this can reduce performance and cause strain. Regularly inspect the auger and chute for blockages and clear them safely with the engine off. Use the correct fuel type and follow the manual’s guidelines for fueling. Always turn off the engine and allow it to cool before performing maintenance or repairs. By following these tips‚ you can ensure a safe and effective snow-clearing experience with your PowerSmart Snow Blower.
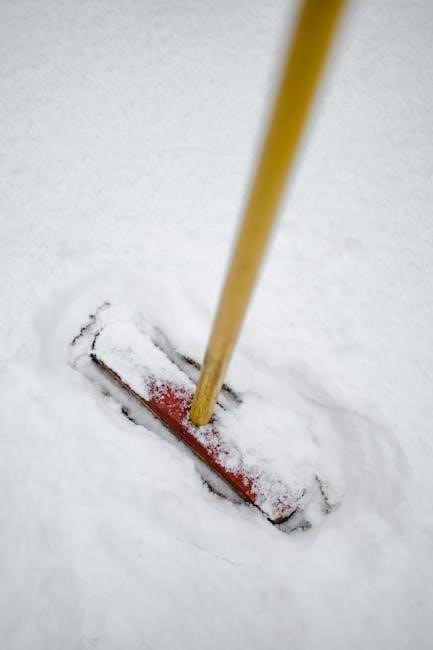
Components and Parts of the Snow Blower
The PowerSmart Snow Blower features a robust engine‚ auger‚ chute‚ and deflector. Additional components include skid shoes‚ controls‚ and belts. Refer to the manual for detailed identification and terminology.
3.1. Major Components Overview
The PowerSmart Snow Blower is designed with key components to ensure efficient snow removal. The engine‚ typically a robust 212cc model‚ powers the machine. The auger and chute work together to collect and direct snow. Adjustable skid shoes allow adaptation to various surfaces. The deflector controls snow discharge direction‚ while the chute rotates for precise placement. Two-stage models feature a friction disk and impeller for enhanced performance. These components are essential for optimal functionality‚ ensuring the snow blower handles different snow conditions effectively. Understanding each part is crucial for proper operation and maintenance. Refer to the manual for detailed diagrams and terminology.
3.2. Controls and Their Functions
The PowerSmart Snow Blower features an intuitive control panel designed for easy operation. The ignition switch starts the engine‚ while the choke helps in cold starting. The throttle adjusts engine speed‚ allowing you to customize power output. The auger control engages the auger for snow intake‚ and the chute rotation lever adjusts the discharge direction. The deflector handle fine-tunes snow throw distance and height. Additional controls include skid shoe adjusters for surface adaptation and drive handles for forward and reverse movement. These controls ensure precise operation‚ making it easier to manage various snow conditions efficiently. Familiarize yourself with each control to optimize performance and safety during use.
3;3. Detailed Parts Diagram and Terminology
The PowerSmart Snow Blower Manual includes a comprehensive parts diagram to help users identify and understand each component. Key components include the auger‚ responsible for breaking up snow‚ and the chute‚ which directs snow discharge. The deflector adjusts the throw distance and height‚ while the skid shoes protect surfaces from damage. The engine powers the unit‚ and the control panel houses essential switches and levers. The diagram also labels the handlebars‚ drive system‚ and auger belt. Familiarizing yourself with these parts is crucial for proper operation‚ maintenance‚ and troubleshooting. Refer to the diagram for accurate terminology and locations to ensure safe and effective use of your snow blower.

Assembly and Setup Instructions
Welcome to the assembly section! Carefully unpack and inventory all parts. Attach the chute and accessories following the manual. Adjust skid shoes for your surface and ensure all components are securely tightened for safe operation.
4.1. Unpacking and Initial Assembly Steps
Begin by carefully unpacking the snow blower and verifying all components against the parts list in the manual. Inspect for any damage or missing items. Place the unit on a flat‚ stable surface. Start by attaching the chute and handlebars using the provided hardware. Tighten all bolts securely but do not overtighten. Next‚ install the skid shoes to protect surfaces during operation. Refer to the manual for specific torque specifications. Ensure all controls are accessible and functioning properly. Finally‚ double-check that all parts are correctly assembled and tightened before moving to the next step. Proper assembly is crucial for safe and efficient operation. Always follow the instructions provided in the manual for accurate setup. If unsure‚ consult the troubleshooting section or contact customer support. This ensures your snow blower is ready for use and performs optimally in various conditions. Proper assembly also prevents potential damage to the machine and ensures user safety. By following these steps‚ you can enjoy hassle-free snow clearing this winter. Always prioritize safety and thoroughness during the assembly process. If any part seems unclear‚ revisit the manual or seek guidance from authorized sources. Your PowerSmart snow blower is designed for durability and ease of use‚ but proper setup is essential to unlock its full potential.
4.2. Attaching the Chute and Other Accessories
After unpacking‚ attach the chute to the main unit by aligning the mounting brackets and securing with the provided bolts. Tighten firmly but avoid overtightening. Next‚ install the handlebars by inserting the ends into the designated slots and fastening with the included screws. Ensure all connections are snug and even. For additional accessories like drift cutters or remote chute control‚ refer to the manual for specific installation steps. Align each part carefully and double-check all fasteners before use. Properly securing the chute and accessories ensures optimal performance and prevents damage. Always follow the manufacturer’s guidelines for accurate assembly. If unsure‚ consult the troubleshooting section or contact customer support for assistance. This step is crucial for safe and efficient operation. By following these instructions‚ you can ensure your snow blower is fully functional and ready for use. Proper assembly guarantees reliability and effectiveness in various snow conditions. Always prioritize precision when attaching accessories to maintain your snow blower’s performance and longevity. If any part seems unclear‚ revisit the manual or seek guidance from authorized sources. Your PowerSmart snow blower is designed for ease of use‚ but careful assembly is key to unlocking its full potential. Ensure all components are securely attached before operation to avoid any issues. This attention to detail will enhance your overall experience with the machine. By adhering to these steps‚ you can enjoy a hassle-free snow-clearing process this winter. Always double-check your work to ensure everything is properly assembled and functioning as intended. This will help prevent potential problems and ensure your snow blower operates smoothly. Proper assembly is the foundation of safe and efficient snow removal. Take your time to ensure every part is correctly secured and aligned. This will not only improve performance but also prolong the lifespan of your PowerSmart snow blower. By following these instructions‚ you can confidently assemble your machine and tackle snowy conditions with ease. Always refer to the manual for specific guidance‚ and don’t hesitate to reach out for support if needed. Your safety and satisfaction are top priorities. With careful assembly‚ your PowerSmart snow blower will be ready to handle any winter challenge effectively.
4.3. Adjusting the Skid Shoes for Different Surfaces
Adjusting the skid shoes on your PowerSmart snow blower ensures proper clearance and prevents damage to surfaces. For smooth surfaces like concrete‚ lower the skid shoes slightly. On uneven or gravel surfaces‚ raise them to avoid scratching. To adjust‚ loosen the mounting bolts using a wrench‚ then slide the skid shoes up or down as needed. Tighten the bolts securely after adjustment. Ensure the blower remains balanced to maintain even snow removal. Regularly inspect the skid shoes for wear and replace them if necessary. Proper adjustment enhances performance and protects both the machine and the surface being cleared. Always refer to the manual for specific torque settings and adjustment guidelines. This step ensures optimal operation across various terrain types. By customizing the skid shoes‚ you can tackle different winter conditions effectively. Adjustments should be made before operation to ensure safety and efficiency. This feature allows your PowerSmart snow blower to adapt to diverse environments seamlessly. Proper skid shoe alignment is crucial for maintaining the machine’s stability and functionality. Take the time to fine-tune this setting for the best results. Your snow blower will perform better with surfaces tailored to your specific needs. Adjusting the skid shoes is a simple yet critical step in maximizing your snow-clearing experience. Always double-check your adjustments before use to ensure everything operates smoothly. This attention to detail will extend the life of your snow blower and improve its overall performance. By following these steps‚ you can customize your machine to handle any surface with ease. Adjusting the skid shoes is an essential part of maintaining your PowerSmart snow blower’s effectiveness and longevity. Keep your machine in top condition by making these adjustments as needed. This ensures reliable performance no matter the surface. Your PowerSmart snow blower is designed to adapt to your needs‚ and proper skid shoe adjustment is key to unlocking its full potential. Always prioritize these adjustments for the best results.
Operating Instructions
Start the engine‚ adjust the chute‚ and operate on various surfaces. Follow safety guidelines‚ monitor progress‚ and clear snow efficiently with optimal chute and deflector settings.
5.1. Starting the Engine and Initial Setup
Before starting‚ ensure the area is clear of debris and read the manual thoroughly. For gas models‚ prime the engine and set the choke to the “start” position. Pull the recoil handle gently until resistance is felt‚ then pull firmly to start. Allow the engine to warm up for a few minutes. For electric models‚ plug in the unit and press the start button. Always check the oil level and ensure it meets the recommended specifications. Adjust the throttle and choke as needed for smooth operation. Ensure all safety features are engaged before use. Proper initial setup ensures efficient performance and longevity of your PowerSmart snow blower.
5.2. Operating the Snow Blower on Different Surfaces
Adjust your PowerSmart snow blower to suit various surfaces for optimal performance. On smooth surfaces like driveways‚ set the skid shoes to a lower position to maintain consistent ground contact. For uneven terrain‚ raise the skid shoes slightly to avoid scraping or damaging the surface. When operating on icy or slippery areas‚ reduce speed and use the slower gear setting to maintain control. For gravel or loose surfaces‚ elevate the skid shoes to prevent debris from being thrown. Always keep the chute directed away from people and windows. Use the variable-speed auger control to match the snow conditions‚ ensuring efficient clearing. Refer to your manual for specific adjustments and techniques tailored to your model.
5.3. Adjusting the Chute and Deflector for Optimal Snow Removal
For optimal snow removal‚ adjust the chute and deflector on your PowerSmart snow blower according to snow conditions. Start with the chute in the straight-ahead position and the deflector in the middle. For light‚ fluffy snow‚ keep the deflector lower to throw snow farther. For heavy‚ wet snow‚ raise the deflector to prevent clogging and ensure even distribution. Adjust the chute direction using the handle or crank to direct snow away from unwanted areas. Make sure to stop the engine before making adjustments for safety. Consult your specific model’s manual or parts diagram for exact instructions‚ as mechanisms may vary. Regular maintenance‚ like lubricating moving parts and clearing debris‚ will keep the chute and deflector functioning smoothly.

Maintenance and Care
Regular maintenance ensures your PowerSmart snow blower operates efficiently. Check and change oil‚ inspect belts‚ and clean or replace worn parts. Refer to the manual for specific instructions.
6.1. Regular Maintenance Schedule
A regular maintenance schedule is crucial for your PowerSmart snow blower’s performance. Start by checking the oil level and quality before each use. Replace the oil every 50 hours of operation or annually‚ whichever comes first. Inspect the auger and chute for damage or blockages and clean them thoroughly. Check the belts for signs of wear‚ cracks‚ or fraying‚ and replace them if necessary. Additionally‚ ensure all bolts and screws are tightened to maintain stability. Finally‚ refer to the manual for specific guidance on lubricating moving parts and inspecting the skid shoes. A well-maintained snow blower ensures reliable operation during winter storms.
6.2. Checking and Changing the Oil
Regular oil checks and changes are essential for maintaining your PowerSmart snow blower’s engine health. Always use the recommended oil type‚ such as 5W-30‚ for optimal performance. To check the oil‚ locate the dipstick under the engine cover‚ wipe it clean‚ and insert it back to get an accurate reading. If the level is low‚ add oil as needed. For oil changes‚ drain the old oil into a pan‚ replace the filter‚ and refill with fresh oil. Perform this maintenance every 50 hours of operation or at the start of each winter season. Proper oil care ensures your snow blower runs smoothly and efficiently throughout the winter.
6.3. Inspecting and Replacing Belts and Auger Parts
Regular inspection of belts and auger parts is crucial for maintaining your PowerSmart snow blower’s performance. Check belts for signs of wear‚ cracks‚ or misalignment‚ and ensure proper tension. If damaged‚ replace belts immediately to avoid engine strain. For the auger‚ inspect for blockages or damage from debris like rocks or ice. Clean out any obstructions and lubricate moving parts as needed. Replace worn or damaged auger parts‚ such as shear pins or paddles‚ to ensure smooth operation. Always refer to your manual for specific part numbers and replacement instructions. Regular maintenance of these components will prevent breakdowns and keep your snow blower running efficiently during harsh winter conditions.

Troubleshooting Common Issues
Identify and resolve common issues like clogged chutes‚ faulty spark plugs‚ or broken belts. Refer to the manual for detailed solutions to ensure optimal performance and safety.
7.1. Common Problems and Solutions
Common issues with your PowerSmart snow blower may include the auger not spinning‚ loss of power‚ or clogged chutes. For the auger‚ check if the shear pins are broken or if the belt is damaged. Replace worn or broken parts immediately. If the chute is clogged‚ turn off the engine‚ wait for it to cool‚ and manually clear the blockage. For power loss‚ ensure proper fuel levels‚ check the air filter for cleanliness‚ and verify that the spark plug is functioning correctly. Always refer to your manual for specific solutions and safety guidelines to maintain your snow blower’s performance and longevity.
- Auger issues: Inspect shear pins and belts for damage.
- Clogged chute: Stop the engine‚ allow it to cool‚ then clear the blockage.
- Power loss: Check fuel levels‚ air filter‚ and spark plug condition.
Regular maintenance and prompt troubleshooting will ensure your snow blower runs efficiently all winter long. Always follow safety precautions when performing repairs.
7.2. What to Do If the Auger Isn’t Spinning
If the auger on your PowerSmart snow blower stops spinning‚ there are several troubleshooting steps to take. First‚ ensure your safety by turning off the engine and allowing it to cool. Check for broken shear pins‚ which may need to be replaced if damaged. Inspect the drive belt for wear or looseness and tighten or replace it as needed. Verify that the gear box is properly engaged. Clear any blockages in the auger by carefully removing snow or ice with a tool. Check the wiring and electrical connections for any issues. Ensure the chute and deflector are functioning freely. If the engine speed is low‚ adjust the throttle or check the air filter. In extreme cold‚ lubricate moving parts. If these steps don’t resolve the issue‚ consider consulting an authorized service center.
- Shear Pins: Replace if broken to restore auger function.
- Drive Belt: Tighten or replace if loose or damaged.
- Blockages: Clear snow or ice carefully to avoid injury.
- Electrical Issues: Check for secure connections and blown fuses.
- Professional Help: Seek expert assistance if problems persist.
By systematically addressing each potential issue‚ you can effectively troubleshoot and restore your auger’s function‚ ensuring efficient snow removal.
7.3. Troubleshooting Loss of Power or Performance
If your PowerSmart snow blower experiences a loss of power or performance‚ several factors could be at play. Begin by inspecting the chute for blockages‚ as snow buildup can restrict airflow. Ensure the deflector is properly adjusted to maintain optimal snow flow. Check the drive belt for wear or damage‚ and verify that all gears are engaged. Low oil levels or dirty air filters can also reduce engine power‚ so perform routine maintenance checks. Additionally‚ ensure the fuel is fresh and of the correct type. If the issue persists‚ consult the manual or contact an authorized service center for professional assistance. Regular upkeep and addressing these common issues can restore your snow blower’s efficiency and performance.
- Chute Blockages: Clear snow accumulation to ensure proper airflow.
- Deflector Adjustment: Position correctly for optimal snow removal.
- Drive Belt: Inspect for wear and ensure proper tension.
- Maintenance: Check oil levels‚ air filters‚ and fuel quality.
Addressing these issues promptly will help maintain your snow blower’s power and performance throughout the winter season.
Storage and Winterization
Proper storage and winterization ensure your PowerSmart snow blower remains in excellent condition; Clean the unit thoroughly‚ drain fuel‚ and store in a dry‚ protected area to prevent damage.
- Drain Fuel: Empty the tank or stabilize fuel to avoid degradation.
- Clean: Remove dirt and debris to prevent rust and corrosion.
- Inspect: Check for worn or damaged parts and replace as needed.
- Store: Keep in a dry‚ sheltered location to protect from moisture.
These steps ensure your snow blower is ready for next winter’s use.
8.1. Proper Storage Techniques for Off-Season
Proper storage is crucial for maintaining your PowerSmart snow blower’s performance. Before storing‚ clean the unit thoroughly to remove dirt‚ snow‚ and debris. Drain the fuel tank or use a fuel stabilizer to prevent degradation. Check for any damaged or worn parts and replace them if necessary. Lubricate moving components to protect against rust. Store the snow blower in a dry‚ well-ventilated area‚ away from direct sunlight and moisture. Avoid leaving it in harsh weather conditions. Cover the unit with a breathable material to protect from dust. Detach the battery if applicable and store it separately in a cool‚ dry place. Proper storage ensures your snow blower remains in excellent condition for the next winter season.
- Clean the unit thoroughly.
- Drain or stabilize fuel.
- Inspect and replace worn parts.
- Lubricate moving components.
- Store in a dry‚ protected area;
- Cover with a breathable material.
- Protect from pests and moisture.
8.2. Winterization Steps to Prepare for Storage
Winterization is essential to ensure your PowerSmart snow blower is ready for storage and performs optimally next season. Start by draining the fuel tank or adding a fuel stabilizer to prevent corrosion and clogging. Change the engine oil to remove contaminants and protect the engine. Check and tighten all bolts and screws to ensure stability. Insulate any exposed metal parts to prevent rust. Apply a rust-inhibiting spray to metal components. Disconnect the battery and store it in a cool‚ dry place. Cover the unit with a durable‚ weather-resistant cover to shield it from dust and moisture. Regular winterization helps maintain your snow blower’s efficiency and extends its lifespan.

Warranty and Customer Support
Your PowerSmart snow blower is backed by a comprehensive warranty. For inquiries‚ contact customer support via phone or website. Refer to your manual for warranty details and assistance options.
9.1. Warranty Information and Coverage
Your PowerSmart snow blower is protected by a comprehensive warranty program designed to ensure your satisfaction and product reliability. The warranty typically covers defects in materials and workmanship for a specified period‚ usually ranging from 2 to 5 years‚ depending on the model and components. Specific details‚ such as the duration of coverage for the engine‚ auger‚ and other parts‚ can be found in your manual or by contacting PowerSmart customer support. It’s important to review the warranty terms to understand what is covered and any conditions that may void the agreement. Proper maintenance and adherence to operating guidelines will help maintain warranty validity and ensure your snow blower performs optimally for years to come.
9.2. Contacting Customer Support
For any inquiries‚ troubleshooting‚ or assistance with your PowerSmart snow blower‚ reaching out to customer support is straightforward. Visit the official PowerSmart website to access contact information‚ including a toll-free phone number and email support. Their team is available Monday through Friday‚ 9 AM to 5 PM EST‚ to address your concerns. Additionally‚ the website offers a wealth of resources‚ such as FAQs‚ manuals‚ and troubleshooting guides‚ to help resolve issues independently. Ensure you have your model number and purchase details ready when contacting support for faster service. PowerSmart is committed to providing timely and effective assistance to ensure your snow blower operates smoothly throughout the winter season.
9.3. Finding Authorized Service Centers
To locate an authorized PowerSmart service center‚ visit the official PowerSmart website and use the “Find a Service Center” tool. Enter your location or zip code to find the nearest certified service providers. These centers are equipped to handle repairs‚ maintenance‚ and part replacements‚ ensuring your snow blower is serviced by professionals. For further assistance‚ contact PowerSmart customer support via phone or email to receive a list of recommended service centers in your area. Always ensure that any repairs are performed by authorized personnel to maintain your warranty and guarantee optimal performance of your snow blower.
10.1. Final Tips for Safe and Effective Use
To ensure safe and effective use of your PowerSmart Snow Blower‚ always wear protective gear like gloves and goggles. Clear the area of obstacles before operating. Never leave the machine unattended while running. Follow the manual’s instructions for proper handling and maintenance. Store the snow blower in a dry‚ secure location during off-season. Regularly inspect belts and auger parts for wear. Keep children and pets away while operating. Use the correct fuel and oil as specified to maintain performance. By following these guidelines‚ you can enjoy efficient snow removal and extend the lifespan of your equipment. Happy snow clearing!
10.2. Additional Resources for Further Assistance
For further assistance‚ visit the PowerSmart official website to download detailed manuals‚ troubleshooting guides‚ and exploded parts diagrams. Contact customer support at 1-800-791-9458 for technical inquiries. Refer to the warranty section for repair or replacement options. Explore online forums and communities for user tips and experiences. Check the PowerSmart YouTube channel for tutorial videos on assembly‚ maintenance‚ and operation. Ensure to register your product for extended support and updates. For specific models like DB7651-24 or PSS2240‚ access the dedicated resource pages. Always consult authorized service centers for professional assistance. These resources will help you maximize your snow blower’s performance and address any concerns effectively.